|
In today's tutorial we'll be creating a floral web banner ideal for a spring sale.  Create a Gradient Background Step 1. First we'll set up our document. (Change the dimensions specific to your website banner size). Width: 1140 px Height: 500 px Colour Mode: RGB Raster Effects: Screen (72ppi) Then click OK. 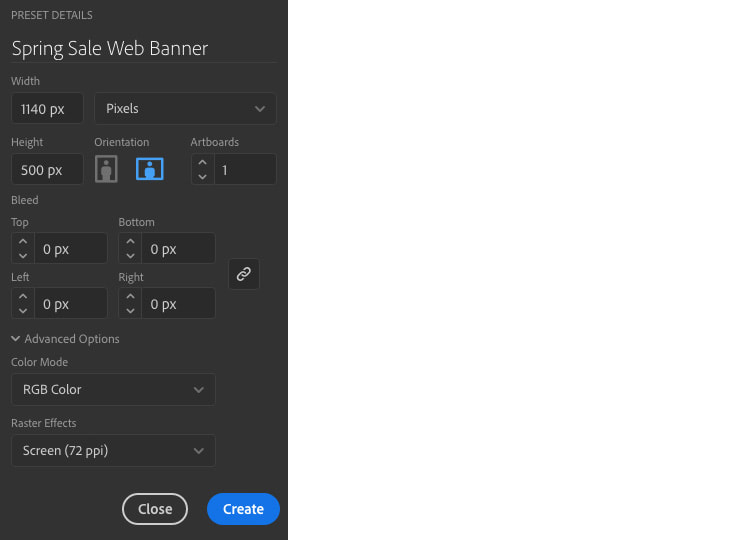 Step 2. In the Layers Panel add a second layer. Use the lower one for the background gradient, and the second one for the flowers and text.  Step 3. Select the Rectangle Tool and set the dimensions to the size of your document (banner dimensions). Fill the shape with a radial gradient, using these colour values: 1. R=216 G=242 B=253 2. R=154 G=219 B=250 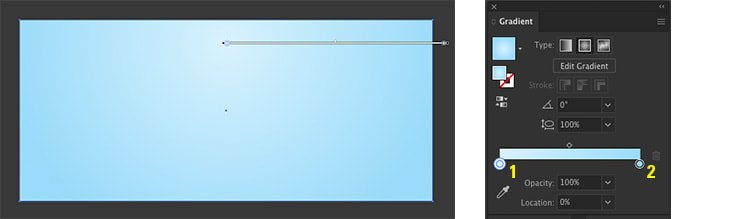 Step 4. Lock the Background Layer and move to the second layer in the Layers Panel. 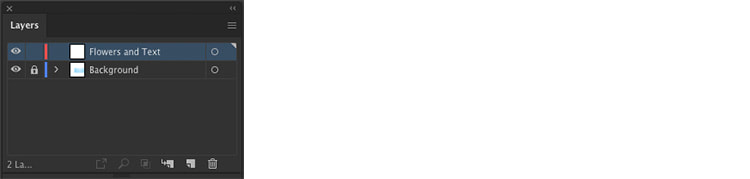 Create the Vector Leaves Step 1. Draw an oval with the Ellipse Tool. Then using the Direct Selection Tool edit the four anchor points to create a shape like below. 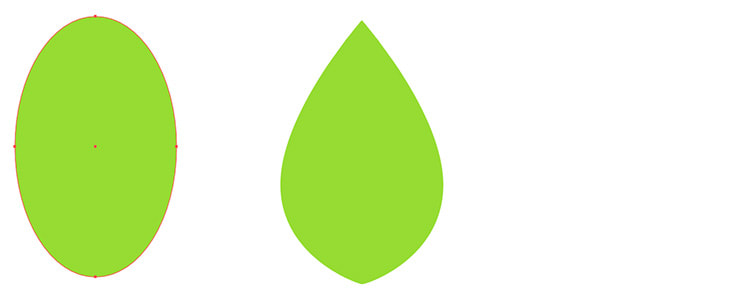 Step 2. In your Toolbar, select the Scissors Tool and click once on the top and bottom anchor points to split the shape in two vertically. Now use the Selection Tool and click on the left half of the leaf. Go to Object > Path > Join to complete the shape. Repeat this for the right half of the leaf too. 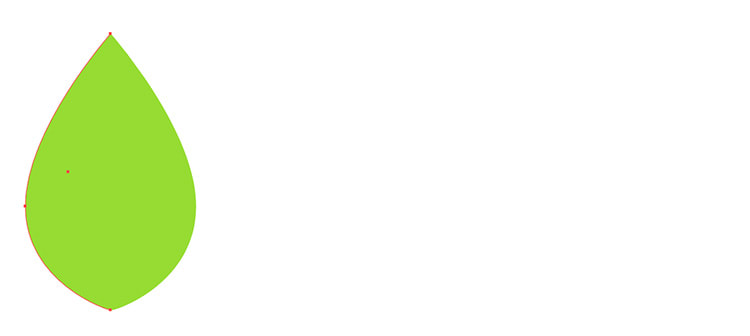 Step 3. Fill both halves of the leaf with a linear gradient using these colour values: 1. R=150 G=220 B=50 2. R=120 G=190 B=50 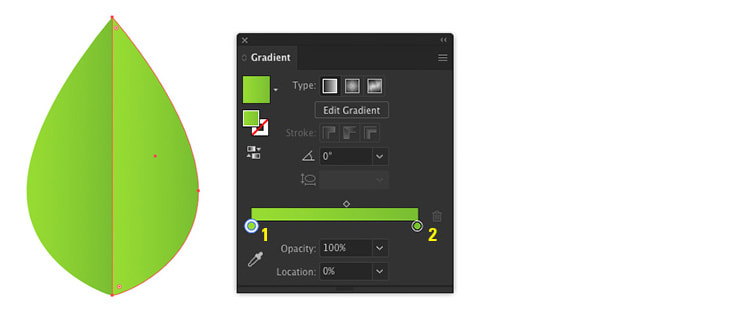 Step 4. Deselect the leaf, then using the Pen Tool draw a long triangle along the centre of the leaf to form the stem. Fill the stem with a solid colour of R=190 G=240 B=50.  Step 5. Use the Selection Tool to select the stem and both halves of the leaf. Once selected go to Object > Group. Let's add a drop shadow to the leaf by going to the menu Effect > Stylize > Drop Shadow. Enter these values for a subtle drop shadow: Mode: Multiply Opacity: 35% X Offset: 0 px Y Offset: 0 px Blur: 3 px Then click OK. 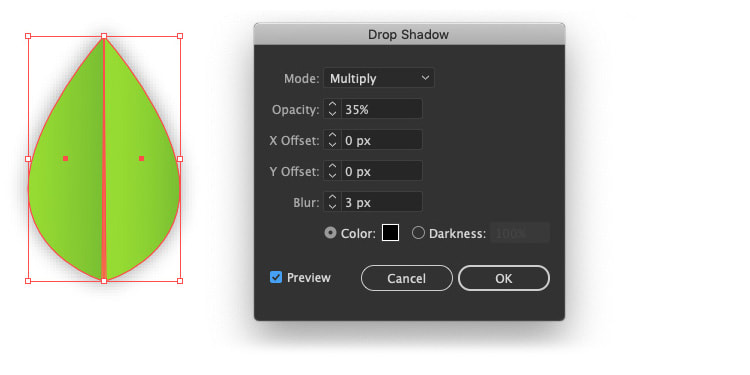 Build the Vector Flowers Step 1. Create a circle with the Ellipse Tool and fill with a radial gradient using these colours: 1. R=180 G=160 B=10 2. R=150 G=115 B=35 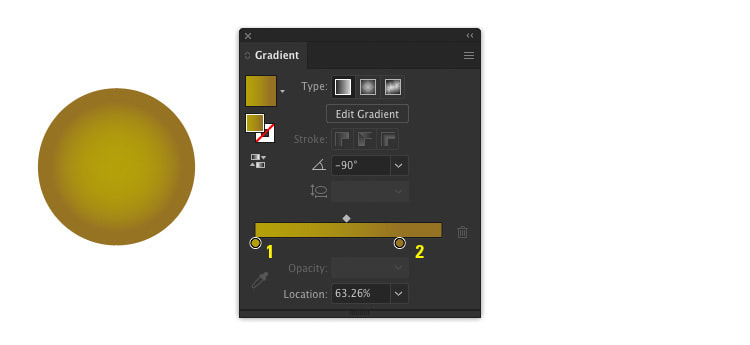 Step 2. Draw a much smaller circle and fill with a linear gradient using the same colours as above. Move it to the top centre of the larger circle. 1. R=180 G=160 B=10 2. R=150 G=115 B=35 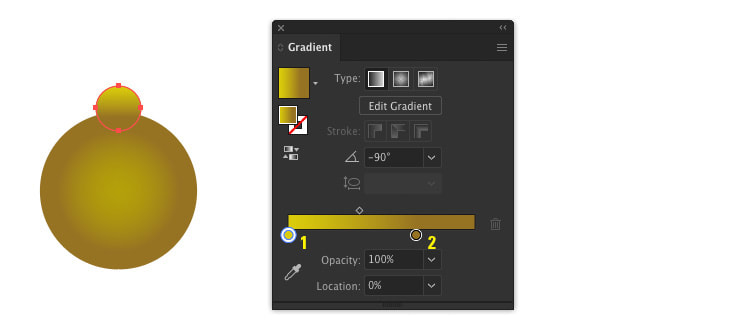 Step 3: Keep the smaller circle selected and switch to the Rotate Tool. Hold down Option on your keyboard and click on the centre of the larger circle (a small cyan marker will appear with the dialogue box). Set the angle to -30° and click Copy. With the smaller circle still selected press Command + D on your keyboard until the circles are rotated around the full edge of the larger circle. Make a copy of the small circle and paste it behind. Next enlarge it slightly and offset it to the first set of smaller circles (see below). Repeat the rotate method then repeat these steps for a third set of circles. 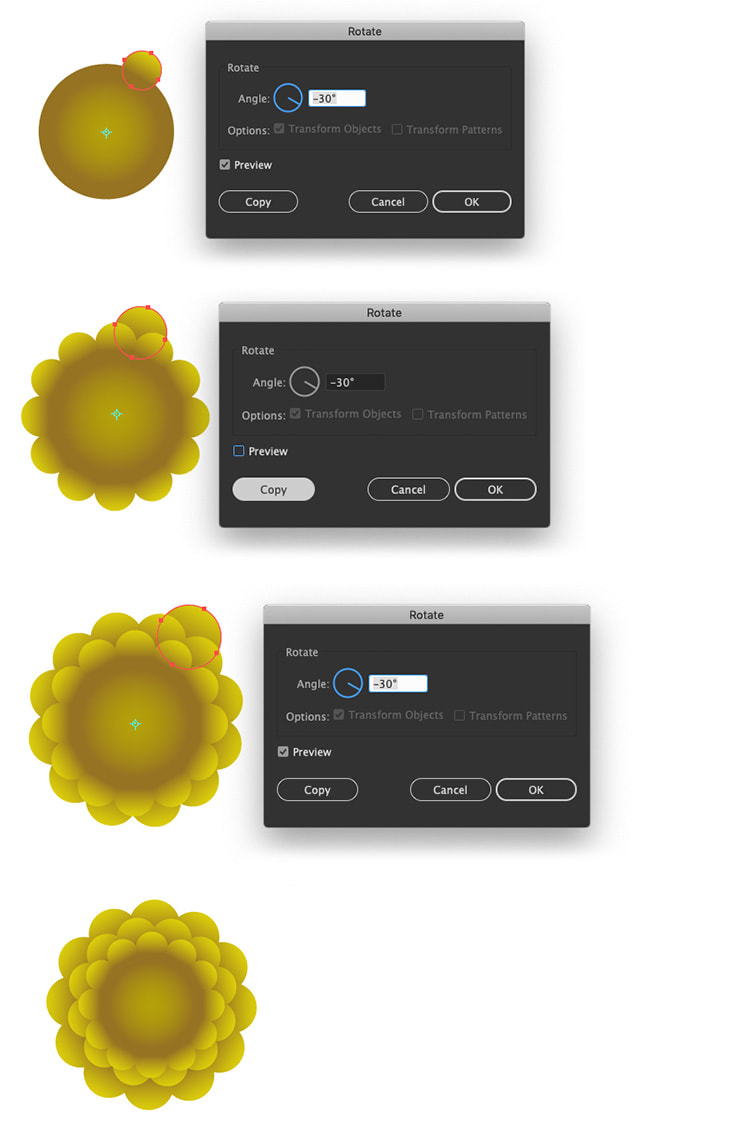 Step 4. To create the petals first draw an oval then use the Direct Selection Tool to shape the anchor points. Fill the petal with a linear gradient at 90° using these colours values: 1. R=172 G=48 B=84 2. R=212 G=70 B=107 3. R=243 G=120 B=134 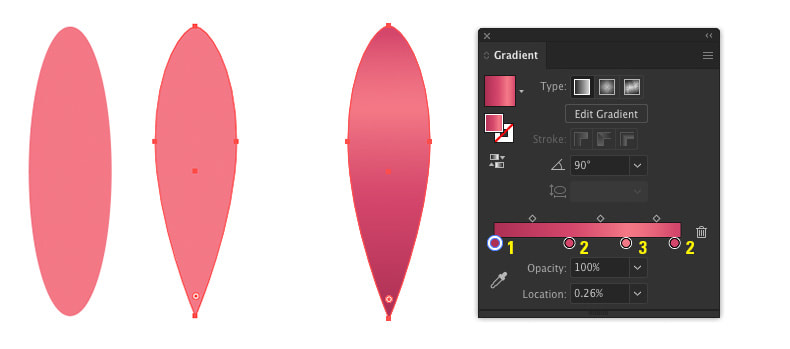 Step 5. Move the petal to align vertically with the flower's centre. Repeat rotate method with the Rotate Tool as seen in the steps previously, except this time change the angle to -60°, then click copy. Press Command + D on your keyboard to continue rotating around the centre until you have 6 petals. Next select all 6 petals with the centre and add a drop shadow with these values: Mode: Multiply Opacity: 35% X Offset: 0 px Y Offset: 0 px Blur: 3 px Then click OK. 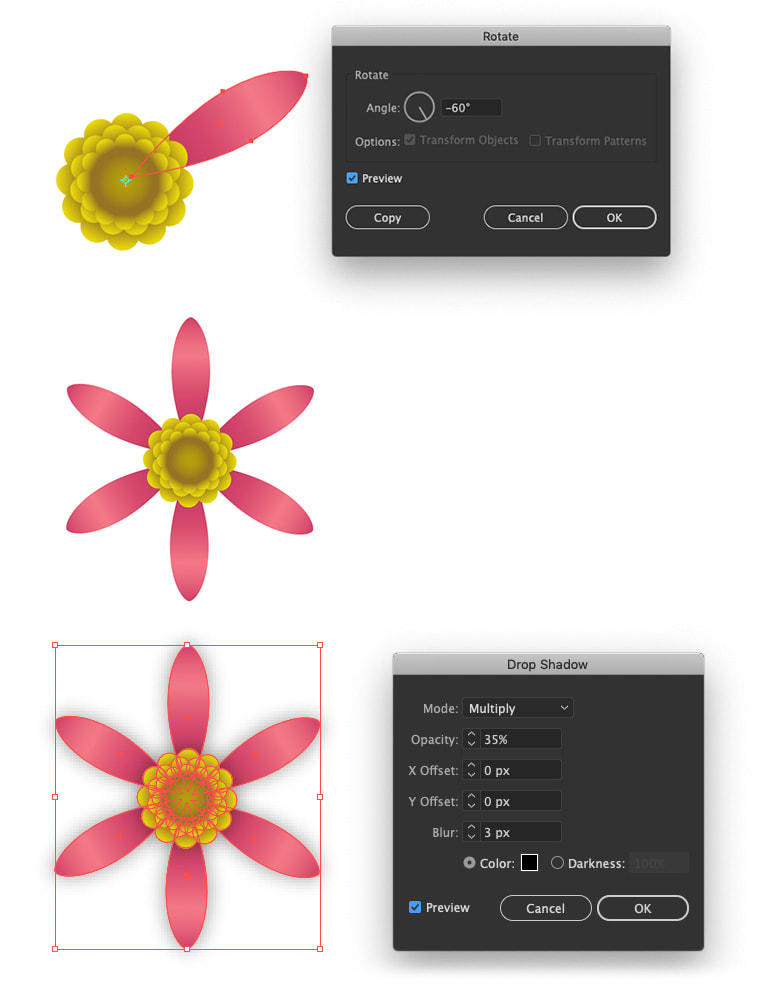 Step 6. Copy the top petal and paste it behind, moved slightly to the right. Use the Rotate Tool to create a second layer of petals, then repeat for a third layer. Make two copies of the finished flower and change the petal's colour. 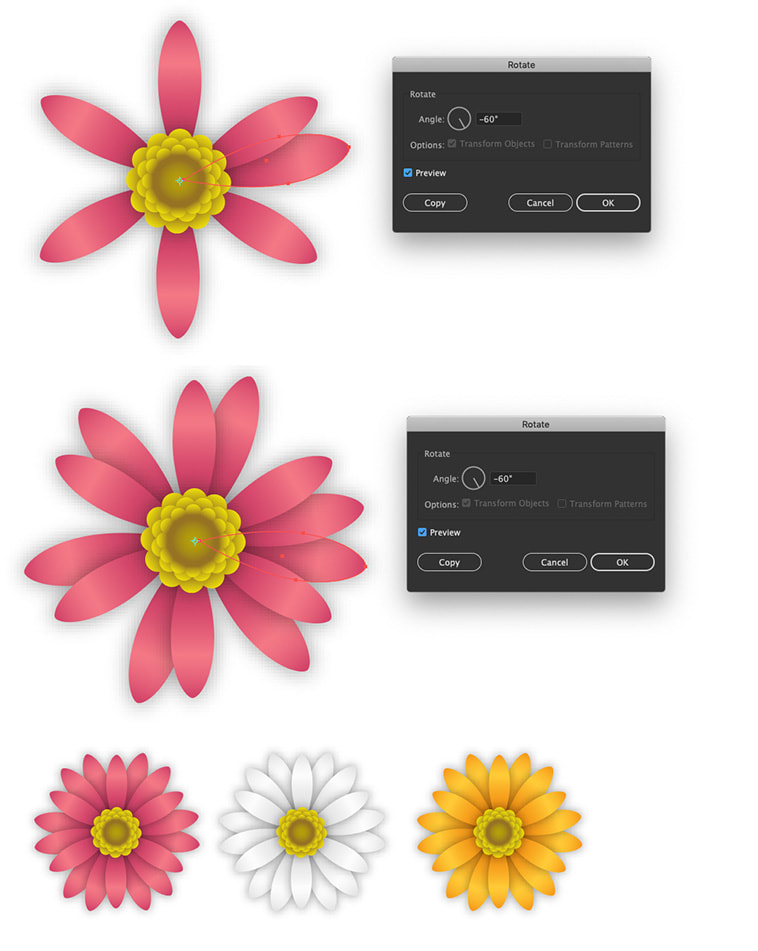 Step 7. Arrange the flowers and leaves on the artboard and add some text to finish.  Thank you for reading this tutorial, if you would like to download the free banner above, click here!
Comments are closed.
|
Contact UsLocal: 604-270-8682
Toll-free: 1-800-663-8273 Weekdays 9AM – 5PM
|
Visit Us#7 - 12840 Bathgate Way,
Richmond, BC, V6V 1Z4 |
|
|